

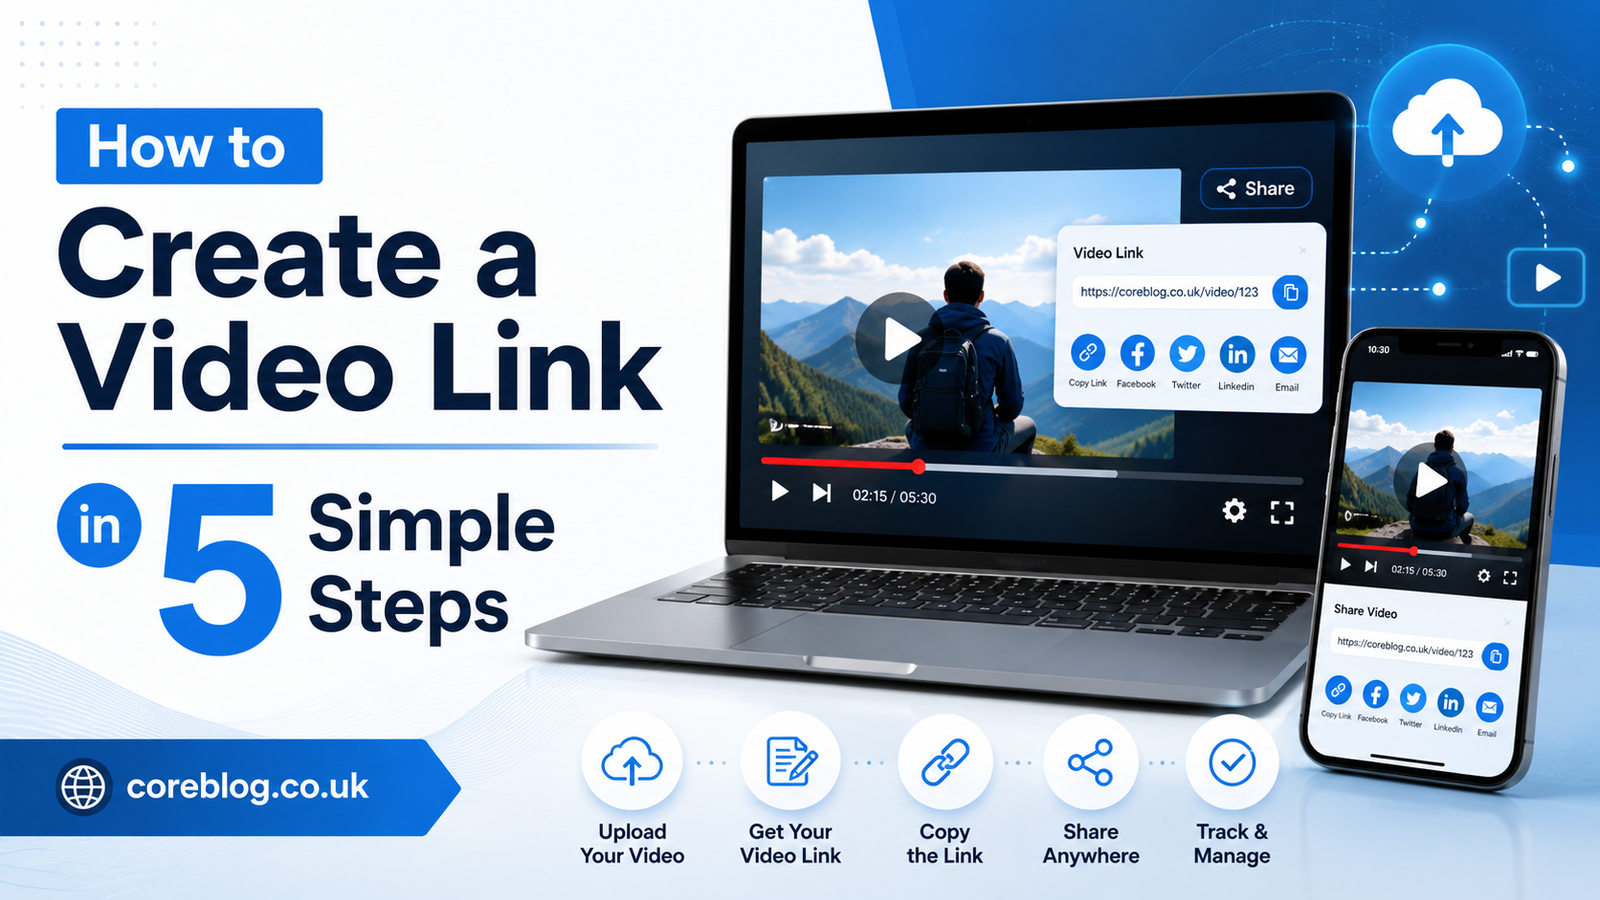
How to Create a Video Link in 5 Simple Steps
Sharing a video should be simple. Yet, anyone who has tried to send a large video file through email or a messaging app knows how quickly things can become frustrating.
The file may be too large. The upload may fail. The video quality may drop. In some cases, the other person cannot even open the file.
That is where a Video Link becomes useful.
Instead of attaching the full video, you upload it to a secure online platform and send a clickable link. The person receiving it can watch, download, or review the video without filling up their device storage.
The process sounds technical, but it is surprisingly easy. You do not need advanced editing skills, expensive software, or professional equipment. In most cases, you can create and share a link within a few minutes.
This guide explains how to create a Video Link in five simple steps. It also covers privacy settings, mobile sharing, common mistakes, video quality, security, and practical tips for smoother sharing.
What Is a Video Link?
A Video Link is a web address that takes a user directly to a video stored online. When someone clicks the address, the video opens in a browser, cloud storage service, video hosting platform, or media player.
The actual video is not stored inside the link. Instead, the link points to the location where the video file is hosted.
For example, you may upload a video to:
- A cloud storage service
- A video hosting platform
- Your own website
- A file-sharing service
- A learning management system
- A business collaboration platform
Once the upload is complete, the platform generates a shareable URL. You can copy that URL and send it through email, social media, text messages, online forums, or workplace chat applications.
How Does a Video Link Work?
A link connects the viewer’s browser to the server where the video is stored. The server then streams or downloads the video based on the platform settings.
Some links allow anyone to watch the content. Others require a password, email address, account login, or special permission.
This means you remain in control of who can access your content.
Why Should You Create a Video Link?
Sending a video as a direct attachment is not always practical. Videos are often much larger than documents, images, or audio files. Even a short high-resolution clip can take up hundreds of megabytes.
A shareable link solves many of these problems.
It Makes Large Videos Easier to Share
Most email providers limit the size of attachments. Messaging apps may also compress videos or reduce their resolution.
When you create a Video Link, the original file stays online. You only send a small text-based URL, so attachment limits are no longer a problem.
It Protects Video Quality
Directly sending a video through certain apps may lower its quality. The app may compress the file to make it smaller and faster to send.
Uploading the original file to a reliable hosting service can help maintain better image quality, sound quality, frame rate, and resolution.
It Saves Storage Space
The recipient does not always need to download the video. They may be able to stream it directly in their browser.
This is helpful for people using mobile devices, tablets, work computers, or devices with limited storage.
It Gives You More Control
A good video-sharing platform may allow you to:
- Limit access to selected people
- Disable downloads
- Add password protection
- Set an expiration date
- Remove access later
- Track views
- Replace the video without changing the link
- Collect comments or feedback
These controls are useful for personal videos, client projects, training materials, online courses, product demonstrations, and confidential presentations.
What You Need Before Creating a Video Link
Before you begin, make sure your video is ready to upload.
Check the complete video from start to finish. Confirm that the sound is clear, the picture is visible, and no private information appears by accident.
You should also know:
- Where the video file is saved
- Who needs access
- Whether viewers can download it
- How long the link should remain active
- Whether the content needs password protection
- Which device you will use for uploading
It is also worth checking your internet connection. Large uploads can fail when the connection is slow or unstable.
Step 1: Choose the Video You Want to Share
The first step is to find the correct video file on your computer, smartphone, tablet, camera, or external storage device.
Open the video before uploading it. This small check can prevent you from sharing the wrong version.
You should confirm:
- The video plays without errors
- The audio is synchronized
- The editing is complete
- The file name is clear
- The correct version is selected
- Sensitive content has been removed
- The opening and closing sections are included
Give the Video a Clear File Name
Avoid confusing names such as:
final-video-new-2-last-version.mp4
A cleaner name would be:
Product-Demo-June-2026.mp4
A clear file name makes the video easier to organize and helps recipients understand what they are opening.
Check the File Size
Large files take longer to upload. They may also use more cloud storage space.
If the file is extremely large, consider compressing it before uploading. However, avoid excessive compression because it can make the video look blurry or create poor audio.
Common Video File Formats
The most widely supported video formats include:
- MP4
- MOV
- AVI
- WMV
- MKV
- WebM
- MPEG
MP4 is often the easiest format to share because it works on most browsers, phones, computers, and media players.
Step 2: Upload the Video to an Online Platform
You cannot create a working public Video Link from a file that exists only on your device. The video must first be uploaded to a location that other people can access online.
There are several hosting options, and each one serves a different purpose.
Cloud Storage
Cloud storage is useful when you want to share the original video file with a client, coworker, friend, or family member.
Popular cloud storage platforms often allow viewers to watch the video online or download the original file.
This method is suitable for:
- Raw video footage
- Client approvals
- School projects
- Family recordings
- Work presentations
- Edited video files
- Private content
Video Hosting Platforms
A video hosting platform is designed for streaming. It may process your upload into several video resolutions so viewers can watch it smoothly on different internet connections.
This option works well for:
- Tutorials
- Public videos
- Educational content
- Interviews
- Product reviews
- Marketing videos
- Recorded webinars
- Entertainment content
Your Own Website
Website owners can upload a video to their media library, server, or content delivery network. However, direct video hosting may use a large amount of bandwidth and slow down the website.
In many cases, embedding a video from a dedicated hosting platform offers better performance.
Video-Sharing Method Comparison
| Method | Best For | Privacy Control | Download Option | Easy Streaming |
|---|---|---|---|---|
| Cloud storage | Private and work files | High | Usually available | Yes |
| Video platform | Public or unlisted content | Medium to high | Sometimes limited | Excellent |
| File transfer service | Temporary sharing | Medium | Usually available | Varies |
| Personal website | Branded content | Customizable | Optional | Depends on hosting |
| Team workspace | Internal collaboration | High | Usually available | Yes |
To upload the video, open your chosen platform and look for a button such as Upload, Add File, New, or Create.
Select the video from your device and wait for the upload to finish. Do not close the browser or disconnect from the internet during this process.
Step 3: Set the Correct Privacy Permissions
Uploading the video is only part of the process. You must also decide who can open it.
This is one of the most important steps because incorrect permissions can either block the intended viewer or expose private content to the public.
Public Access
A public video can usually be viewed by anyone. It may also appear in search results, recommendations, channel pages, or platform feeds.
Use public access for content that you are comfortable sharing widely.
Examples include:
- Public tutorials
- Business promotions
- Product demonstrations
- Educational videos
- Entertainment clips
- Brand announcements
Unlisted Access
An unlisted video does not normally appear in public search results. However, anyone with the link may be able to watch it.
This is a convenient choice for content that is not secret but should not be easily discovered.
It works well for:
- Client previews
- Event recordings
- Private lessons
- Portfolio samples
- Internal demonstrations
- Early content reviews
Restricted or Private Access
Private access limits the video to approved accounts, email addresses, or team members.
Choose this setting for:
- Confidential business information
- Employee training
- Personal family content
- Paid course materials
- Legal documents
- Private customer recordings
- Unreleased media
Check Viewer and Editor Permissions
Some platforms allow you to choose whether another person can view, comment, download, or edit the file.
Do not give editing permission unless the recipient genuinely needs it. A viewer should not be able to delete, replace, rename, or move your original video.
After selecting your settings, save or apply the changes.
Step 4: Copy the Video Link
Once the video is uploaded and the privacy settings are correct, look for a sharing option.
Depending on the platform, it may be labeled:
- Share
- Copy link
- Get link
- Share URL
- Invite people
- Manage access
- Send
- Publish
Click the relevant option and copy the generated URL.
Your Video Link will usually begin with https://. It may contain a combination of letters, numbers, symbols, and the platform’s domain name.
Copying a Link on a Computer
On a desktop computer or laptop:
- Open the uploaded video.
- Click the share button.
- Review the access settings.
- Select the copy link option.
- Paste the URL into your message, email, or document.
You can paste the copied address by right-clicking and selecting Paste. You can also use the standard keyboard shortcut for pasting.
Copying a Link on a Phone
On a smartphone:
- Open the storage or video app.
- Find the uploaded file.
- Tap the share icon or menu button.
- Choose the link-sharing option.
- Tap copy.
- Paste it into your chosen app.
The exact wording may vary, but the process is usually similar on Android devices, iPhones, and tablets.
Step 5: Test and Share the Video Link
Never assume the link works simply because you copied it.
Testing takes less than a minute, yet it can save you from sending a broken or restricted link to dozens of people.
Open a private or incognito browser window and paste the URL. A private window is useful because it does not automatically use your logged-in account.
Check whether:
- The video opens
- Playback starts correctly
- The audio works
- The picture quality is acceptable
- The title is correct
- The viewer has the right permissions
- A login is required
- Downloading is enabled or disabled as intended
- The link works on mobile
If everything looks right, your Video Link is ready to share.
Add Context When Sharing the Link
Do not send a bare URL without explaining what it contains.
A better message would be:
“Here is the updated product demonstration video. Please review the introduction and send your feedback before Friday.”
A short explanation builds trust and makes the recipient more likely to open the content.
How to Create a Video Link on a Mobile Phone
You do not need a computer to create a link. Most cloud storage and video platforms offer mobile apps.
The basic process is simple:
- Open the video in your phone gallery.
- Tap the share option.
- Select a cloud storage or video app.
- Wait for the upload to complete.
- Open the uploaded file.
- Adjust the privacy settings.
- Copy the sharing address.
- Test it in a mobile browser.
- Send it to the intended viewer.
Make sure your phone has enough battery power and a stable Wi-Fi connection. Uploading a long high-definition video through mobile data may use a significant amount of your data allowance.
How to Create a Video Link for Email
Email attachment limits make links especially useful.
First, upload your video to a cloud service or hosting platform. Then copy the shareable address and paste it into the email body.
You can make the message more professional by using descriptive anchor text, such as:
- Watch the project presentation
- View the product demonstration
- Review the training video
- Open the event recording
- Watch the full tutorial
Descriptive wording looks cleaner than a long raw URL. It also tells the reader exactly what will open after clicking.
How to Create a Video Link for Social Media
Social media platforms often support direct video uploads. However, using an external link may be useful when you want to send viewers to a longer video, private recording, landing page, portfolio, or full presentation.
Before posting, check whether the platform displays a thumbnail or link preview.
A good social post should include:
- A clear opening sentence
- A reason to watch
- A short description
- The video address
- A direct call to action
Keep in mind that some social networks reduce the reach of posts that send users away from the platform. Native uploads may perform better for engagement, while external links may be better for website traffic or lead generation.
Common Video Link Problems and How to Fix Them
Even a correctly uploaded video can sometimes create problems. Fortunately, most issues have simple solutions.
The Link Says Access Denied
This usually means the sharing permissions are too strict.
Open the video settings and confirm that the recipient has access. You may need to add their email address or change the setting to allow anyone with the link to view it.
The Video Is Still Processing
Large or high-resolution uploads may need time to process after the file reaches 100 percent.
During processing, the video may look blurry, fail to play, or only be available in low resolution. Wait until the platform finishes preparing the file.
The Video Quality Looks Poor
Poor quality may be caused by:
- Heavy compression
- Low original resolution
- Slow internet speed
- Incomplete processing
- Automatic playback settings
- A low-quality export
- Screen recording limitations
Check the playback quality menu and select a higher resolution. If that does not help, upload a better copy of the original file.
The Link Has Expired
Some temporary file-sharing services automatically remove uploaded content after a set period.
Create a new Video Link or move the file to a long-term storage platform if viewers need ongoing access.
The Link Works for You but Not for Others
This often happens because you are signed into the account that owns the video.
Test the URL in an incognito browser. This shows you what an outside viewer will experience.
The URL Is Too Long
Long addresses can look untidy in emails or social posts. You can hide the raw URL behind descriptive anchor text where the platform allows it.
Be careful with unknown link-shortening tools. A shortened address hides the destination, which may make some recipients suspicious.
How to Share Video Links Safely
A Video Link can be forwarded, copied, saved, or shared with other people. Therefore, you should treat the link as a key to your content.
Avoid Public Access for Sensitive Videos
Do not use an open public setting for confidential recordings, financial information, private conversations, customer data, medical content, or internal company material.
Use restricted access instead.
Add Password Protection
If the platform offers password protection, use a strong and unique password. Send the password through a different communication channel when the content is highly sensitive.
For example, send the link by email and the password through a phone message.
Set an Expiration Date
Temporary access is useful for client reviews, contract work, event previews, and time-sensitive projects.
Once the review period ends, the link can stop working automatically.
Remove Unnecessary Metadata
A video file may contain information such as the recording date, device model, location details, or creator name.
Review the file information before sharing sensitive content.
Keep a Backup
Do not rely on a single online copy. Save the original video on a computer, external drive, or separate cloud account.
Online files may be deleted accidentally, removed due to policy issues, or lost when an account is closed.
Tips for Making a Video Link More Professional
Creating the link is easy. Presenting it professionally requires a little more care.
Use a Clear Video Title
A useful title tells the viewer what the content contains.
Instead of:
video123-final.mp4
Use:
Beginner-Photography-Training-Part-One.mp4
Add a Thumbnail
A strong thumbnail can increase clicks and make the video easier to recognize. Choose a clean image with readable text and a clear subject.
Avoid misleading thumbnails. They may increase initial clicks, but they reduce trust.
Write a Short Description
Explain what the viewer will learn or see. Keep the description direct and useful.
Mention the video length if it helps the audience plan their time.
Include Captions
Captions improve accessibility and help people watch without sound. They are also useful for viewers who speak a different first language.
Add a Transcript
A written transcript makes the video content easier to search, scan, quote, and understand. It can also support your website’s search engine optimization.
How to Use a Video Link for SEO
When a video appears on a website, it can support user engagement and content quality. However, simply adding a URL is not enough.
Use the video as part of a useful page that includes original written content.
Place It Near Relevant Text
The video should appear beside content that explains its topic. A cooking video belongs in a recipe article, while a product tutorial belongs on a product support page.
This context helps readers and search engines understand the content.
Use Descriptive Anchor Text
Avoid vague phrases such as “click here.”
Use specific wording, such as:
- Watch the video editing tutorial
- View the full product walkthrough
- See the installation demonstration
- Open the beginner training video
Add Supporting Content
Include a summary, key points, captions, frequently asked questions, or a transcript.
Moreover, make sure the page loads quickly and works well on mobile devices.
Use Accurate Titles and Descriptions
Do not promise something the video does not deliver. Clear titles improve trust, reduce quick exits, and attract the right audience.
Frequently Asked Questions
Can I Create a Video Link for Free?
Yes. Many cloud storage services, file-sharing tools, and video platforms offer free accounts. Free plans may include storage limits, upload limits, advertisements, or fewer privacy controls.
Can I Turn a Video File Into a Link Without Uploading It?
A local file path only works on your own device. To create a link that other people can open, the video must be uploaded to an internet-connected server or sharing platform.
Can Anyone Open My Video Link?
That depends on the permissions you select. A public link may be open to everyone, while a restricted link may only work for approved users.
Can I Stop Someone From Downloading the Video?
Some platforms allow owners to disable downloads. However, no online method offers perfect protection because viewers may use screen recording software or other capture methods.
Only share content with people you trust.
How Long Does a Video Link Last?
Some links remain active until the owner deletes the video. Temporary transfer links may expire after a few days or weeks.
Check the platform’s expiration settings before sharing important content.
Can I Change the Video Without Changing the Link?
Certain professional platforms allow you to replace the video file while keeping the same address. On other platforms, uploading a new version creates a completely new link.
Why Is My Video Link Not Clickable?
Some apps do not automatically convert pasted text into a clickable address. Make sure the full URL includes https:// and does not contain accidental spaces or missing characters.
Conclusion
Creating a Video Link is one of the easiest ways to share large video files without dealing with attachment limits, slow transfers, or heavy compression.
The process only requires five basic steps: choose the correct video, upload it to a trusted platform, set the right permissions, copy the link, and test it before sharing.
The testing step is especially important. A link may work perfectly for the owner while remaining blocked for everyone else. Opening it in a private browser window helps you spot permission problems before the recipient does.
You should also think carefully about privacy. Public content can use open sharing, while business files, client videos, private recordings, and paid materials need stronger access controls.
Now that you know how to create a Video Link, choose a video from your device and try the process yourself. Once you have tested the link, share this guide with someone who often struggles to send large video files, or leave a comment about the sharing method that works best for you.









Leave a Reply