

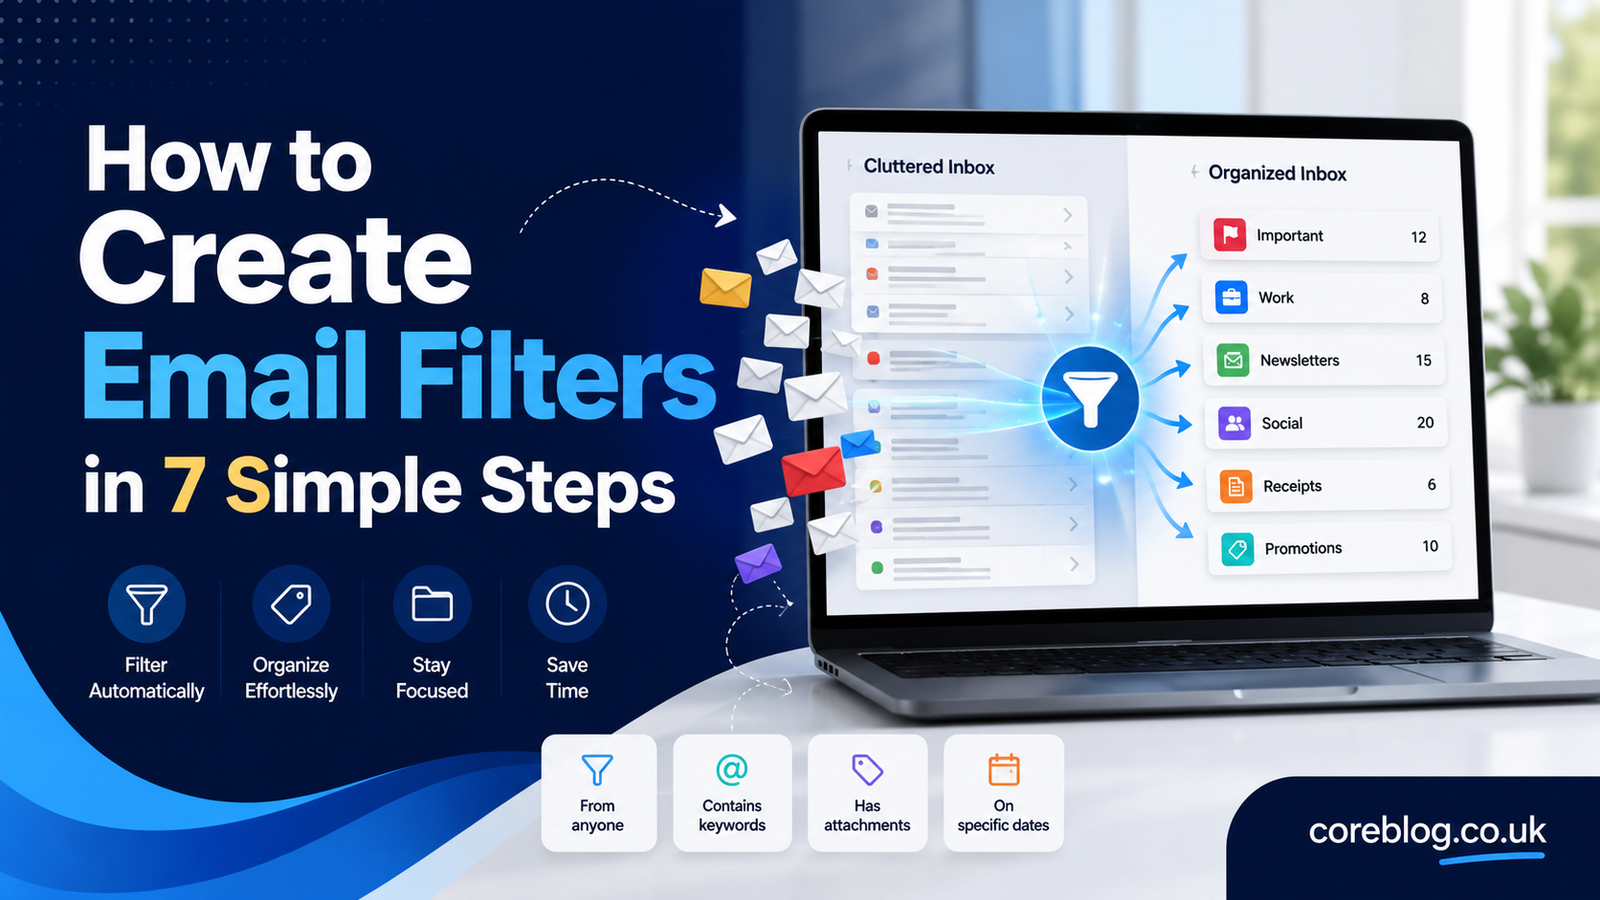
How to Create Email Filters in 7 Simple Steps
An overflowing inbox can turn a simple workday into a stressful one. You open your email to check one important message, but instead, you find newsletters, order updates, meeting reminders, promotions, and old notifications competing for your attention.
Before you know it, you have spent twenty minutes sorting messages instead of doing the task you originally planned.
The good news is that you do not need to organize every email by hand. You can Create Email Filters that automatically sort, label, archive, forward, or delete messages based on rules you choose.
Think of an email filter as a personal assistant inside your inbox. It looks at each incoming message, checks it against your instructions, and takes the correct action. Once the filter is active, it keeps working quietly in the background.
In this guide, you will learn how to Create Email Filters in seven simple steps. You will also discover useful filter ideas, common mistakes to avoid, and practical ways to keep your inbox clean without missing important emails.
What Is an Email Filter?
An email filter is an automated rule that manages incoming or existing messages according to specific conditions.
For example, you can tell your email service:
- Send all invoices to a finance folder
- Add a label to emails from a specific client
- Archive newsletters after they arrive
- Mark messages from your manager as important
- Move shopping receipts into a separate folder
- Delete repeated promotional messages
- Forward support requests to another address
The email platform checks details such as the sender, recipient, subject line, keywords, attachments, message size, or date. When a message matches your chosen criteria, the system performs the action you selected.
This process is often called email automation, inbox filtering, rule-based organization, or automated message sorting.
Why Should You Create Email Filters?
A messy inbox does more than look untidy. It can slow down your work and make important communication harder to find.
When you Create Email Filters, you give every type of message a clear destination. As a result, your inbox becomes easier to scan and manage.
You Save Time
Manually moving, labeling, and deleting emails may take only a few seconds per message. However, those seconds quickly add up when you receive dozens or hundreds of emails each day.
An automatic email rule can complete the same task instantly.
You Reduce Inbox Clutter
Newsletters, social alerts, promotional emails, receipts, and system notifications can bury urgent messages. Filters separate low-priority content from emails that need your attention.
You Find Important Emails Faster
A good folder structure makes email search easier. Instead of scrolling through your entire inbox, you can open a client, project, payment, or travel folder and find the right message quickly.
You Improve Productivity
Frequent notifications can break your focus. Filters help you control which emails stay in your primary inbox and which ones move elsewhere.
You Lower the Risk of Missing a Message
Important emails can disappear inside a crowded inbox. A filter can star, flag, categorize, or label messages from key contacts, making them more visible.
Before You Create Email Filters
A few minutes of planning can prevent confusion later.
Start by looking at the messages you receive most often. Try to place them into broad categories.
Common email categories include:
- Work and client communication
- Personal messages
- Newsletters and subscriptions
- Bills and payment confirmations
- Online shopping receipts
- Travel bookings
- Project updates
- Social media notifications
- Calendar reminders
- Account security alerts
- Customer support requests
- Job applications
- Marketing campaigns
Next, decide what should happen to each type of message.
Some emails should stay in the inbox. Others can be labeled, moved, archived, forwarded, marked as read, or deleted.
Do not build dozens of rules at once. Start with the messages that cause the most clutter. You can add more filters later.
How to Create Email Filters in 7 Simple Steps
Most major email platforms use a similar filtering process, although the wording of buttons and menu options may differ.
You might see terms such as Filters, Rules, Mail Rules, Inbox Rules, Message Rules, or Automation. Despite the different names, the basic method remains the same.
Step 1: Choose the Emails You Want to Organize
The first step is deciding which messages the filter should catch.
Open your inbox and identify a group of similar emails. You may notice that they come from the same sender, contain the same phrase, or use a repeated subject line.
For example, imagine you receive weekly reports with the subject:
“Weekly Website Performance Report”
You can create a filter based on that exact phrase. Every future message containing it can move into a folder called Website Reports.
Other useful filtering conditions include:
- Sender’s email address
- Sender’s domain name
- Recipient address
- Words in the subject
- Words in the email body
- Messages containing attachments
- Emails sent to a mailing list
- Message size
- Date received
- Priority level
- Read or unread status
Choose a condition that is specific enough to find the correct messages.
A Practical Example
Suppose an online store sends order confirmations from orders@example.com. Filtering by the sender address may work well.
However, if the same address also sends password alerts and delivery problems, filtering every message from that sender may be too broad. In that case, use a subject phrase such as “Order Confirmation” instead.
Step 2: Open the Filter or Rules Settings
Next, find the filter settings inside your email account.
In most email services, you can reach these settings through one of three places:
- The main settings menu
- A search options panel
- A menu attached to an individual email
Look for labels such as:
- Create rule
- Filter messages
- Manage rules
- Inbox rules
- Advanced search
- Automate
- More actions
Some platforms allow you to open an existing message and create a rule based on that sender. This method is useful because the email address and subject details may be added automatically.
Another option is to open the full settings area. This gives you more control over conditions and actions.
Before saving anything, review the selected email account. This matters when you manage several addresses inside the same app.
Step 3: Set the Filter Conditions
The condition tells the email system what to look for.
To Create Email Filters that work well, avoid making the rule too broad. A loose condition may catch unrelated messages, while an overly narrow condition may miss emails you intended to organize.
Common conditions include:
| Filter condition | Best use |
|---|---|
| From | Organizing messages from a person or company |
| To | Sorting mail sent to a specific address or alias |
| Subject contains | Filtering reports, receipts, alerts, or newsletters |
| Has the words | Finding messages with specific terms |
| Does not have | Excluding unwanted topics |
| Has attachment | Sorting documents, invoices, or applications |
| Message size | Managing large files |
| Mailing list | Organizing subscription emails |
| Date or age | Cleaning older messages |
You can often combine two or more conditions.
For example:
- From: billing department
- Subject contains: invoice
- Has attachment: yes
This combination is safer than filtering every message containing the word “invoice.”
Use Exact Terms Where Possible
Specific phrases usually produce better results than single words.
The word “report” could appear in many unrelated messages. The phrase “Monthly Sales Report” is far more precise.
Use Exclusions Carefully
Exclusions can protect important emails from being moved or deleted.
For instance, you may filter promotional messages from a retailer but exclude emails containing words such as:
- Refund
- Delivery problem
- Security alert
- Payment failed
This allows routine promotions to skip the inbox while urgent customer messages remain visible.
Step 4: Choose What the Filter Should Do
After selecting the conditions, choose the action.
This is the part that actually organizes your inbox.
Common filter actions include:
- Apply a label
- Move to a folder
- Archive the message
- Mark as read
- Mark as important
- Add a star or flag
- Forward to another address
- Delete the message
- Send an automatic reply
- Assign a category
- Stop further rules from running
The right action depends on the value of the email.
Apply a Label or Move to a Folder
This is often the safest choice for a new filter. The message remains available, but it is placed in an organized category.
Useful folder names include:
- Clients
- Invoices
- Receipts
- Travel
- Newsletters
- Project Updates
- Applications
- Support Requests
- Orders
- Security Alerts
Archive the Message
Archiving removes a message from the main inbox without deleting it.
This works well for newsletters, automated reports, and routine notifications that you may want to read later.
Mark as Important
Use this action for messages from essential contacts, such as a manager, major client, business partner, school, or family member.
Mark as Read
This option is helpful for automated notifications that do not require immediate attention.
However, use it carefully. A message marked as read may be easier to overlook.
Forward the Message
Automatic forwarding can help teams manage shared tasks. For example, website enquiries can be forwarded to a sales address, while technical issues go to a support mailbox.
Before using forwarding, check that the message does not contain private, financial, or confidential information.
Delete the Message
Deletion is useful for repeated spam or unwanted notifications. Still, it is usually better to test the rule before enabling automatic deletion.
One small mistake could send valuable emails to the trash.
Step 5: Test the Filter Before Using It
Testing is one of the most important steps, yet many people skip it.
Before you save the rule, use the search or preview option to see which existing emails match the selected conditions.
Review several results and ask:
- Are all these messages related?
- Is anything important included by mistake?
- Does the filter miss any emails it should catch?
- Is the sender address correct?
- Is the subject phrase too broad?
- Should I add an exclusion?
A good test can prevent lost messages later.
Test With a Safe Action First
When you Create Email Filters, begin with a low-risk action such as applying a label.
Let the rule run for a few days. Then check the labeled messages.
Once you are confident that the filter works correctly, you can add stronger actions such as archiving, forwarding, or deleting.
Step 6: Save and Apply the Filter
After checking the conditions and actions, save the filter.
Some email providers also ask whether you want to apply the rule to existing messages. This option can clean up years of inbox clutter in seconds.
For example, a new receipt filter may find hundreds of old purchase confirmations. Applying the filter to matching conversations moves them into the correct folder immediately.
However, review the search results first. A filter that works well for new messages may affect old emails in unexpected ways.
After saving, send yourself a test email when possible. Use the sender, subject line, or keyword that should activate the rule.
Then confirm that the message:
- Arrived successfully
- Received the correct label
- Moved to the right folder
- Was marked properly
- Did not disappear unexpectedly
If the message lands in the wrong place, edit the filter rather than creating another overlapping rule.
Step 7: Review and Improve Your Filters
Email filters are not something you set once and forget forever.
Your projects, subscriptions, contacts, and priorities will change. Therefore, review your automated rules every few months.
Look for filters that:
- No longer match any messages
- Use outdated email addresses
- Move important mail out of sight
- Duplicate another rule
- Depend on an old project name
- Send messages to folders you no longer check
- Automatically delete useful content
- Conflict with newer rules
A simple review keeps your inbox automation accurate.
You may also notice new patterns. Perhaps you are receiving more meeting notes, job alerts, delivery updates, or payment reminders. These are good opportunities to Create Email Filters that match your current needs.
Useful Email Filters You Can Create Today
You do not need a complicated inbox management system. A few practical filters can make a noticeable difference.
Filter Newsletters
Condition:
- Message comes from a newsletter sender
- Or the email contains an unsubscribe notice
Action:
- Apply a Newsletters label
- Archive it
- Keep it available for later reading
This prevents subscription emails from crowding your main inbox.
Filter Receipts and Order Confirmations
Condition:
- Subject contains “receipt,” “order confirmed,” or “payment received”
Action:
- Move to a Receipts or Purchases folder
This makes expense tracking and return requests much easier.
Filter Client Emails
Condition:
- Sender uses a client’s email address or company domain
Action:
- Apply the client’s name as a label
- Mark as important
- Keep in the inbox
This creates a simple client communication system.
Filter Job Alerts
Condition:
- Sender is a recruitment website
- Subject contains “new jobs,” “job alert,” or “recommended roles”
Action:
- Move to a Job Alerts folder
- Mark as read if preferred
Filter Travel Messages
Condition:
- Subject contains “booking,” “flight,” “hotel,” “reservation,” or “itinerary”
Action:
- Apply a Travel label
- Mark as important
You can also create a separate folder for each trip.
Filter Account Security Alerts
Condition:
- Subject contains “new login,” “security alert,” “password changed,” or “verification code”
Action:
- Apply a Security label
- Mark as important
- Never send directly to trash
Security messages should remain visible because they may warn you about unauthorized activity.
Filter Project Updates
Condition:
- Subject contains a project name
- Sender belongs to a project team
- Recipient is a project mailing list
Action:
- Apply a project label
- Move to the project folder
How Many Email Filters Should You Use?
There is no perfect number.
Some people need only five filters. Others manage several businesses, teams, or projects and may use dozens.
The goal is not to build the largest automation system. The goal is to make email easier to manage.
A useful filter should do at least one of these things:
- Save time
- Reduce clutter
- Highlight important messages
- Improve search
- Support a clear workflow
If a filter creates confusion, hides emails, or adds unnecessary categories, remove it.
Start small. You might first Create Email Filters for newsletters, receipts, clients, and security alerts. These four categories can remove a large amount of noise from a busy inbox.
Common Email Filtering Mistakes
Filters are powerful, but careless rules can create problems.
Using Conditions That Are Too Broad
Filtering every email containing “sale” may catch business discussions, property updates, and client messages.
Use complete phrases, sender addresses, or combined conditions instead.
Automatically Deleting Messages Too Soon
A delete action may seem convenient, but it leaves little room for mistakes.
Use a label or archive action first. After testing the filter, decide whether deletion is truly necessary.
Creating Overlapping Rules
Two filters may act on the same email. One could label the message while another archives or deletes it.
Review your filter order and remove duplicate rules.
Creating Too Many Folders
A folder for every sender can make your mailbox harder to navigate.
Use broad, meaningful categories. For example, one Receipts folder is usually better than separate folders for every shop.
Forgetting to Check Filtered Folders
A well-organized folder is useless if you never open it.
Set a regular time to review newsletters, reports, job alerts, and other non-urgent categories.
Filtering Important Messages Out of the Inbox
Be careful with messages related to payments, account access, contracts, deadlines, and security.
Use labels and importance markers instead of automatic archiving until you trust the rule.
How to Build a Simple Inbox Organization System
Email filters work best when they support a clear structure.
A basic system might use these categories:
| Category | Typical content | Recommended action |
|---|---|---|
| Action Needed | Tasks, approvals, urgent questions | Keep in inbox and mark important |
| Clients | Client discussions and project mail | Apply client label |
| Finance | Invoices, bills, and payment records | Move to Finance folder |
| Receipts | Order and transaction confirmations | Archive with label |
| Newsletters | Articles, updates, and promotions | Archive for later |
| Travel | Bookings, tickets, and itineraries | Label and mark important |
| Security | Login and account warnings | Keep visible |
| Notifications | Automated platform updates | Mark as read or archive |
This system is easy to maintain because every category has a clear purpose.
Tips for Better Email Automation
Once you understand how to Create Email Filters, a few small habits can improve the results.
Use Clear Folder Names
Choose names you can understand at a glance. Avoid vague labels such as “Other,” “Stuff,” or “Later.”
Keep Important Messages Visible
Not every filtered message should leave the inbox. Important emails can stay in place while receiving a label, category, star, or flag.
Combine Conditions
A sender address plus a subject phrase is often more reliable than either condition alone.
Review Your Spam Folder
Sometimes legitimate automated emails are mistaken for spam. Check the spam folder when a report, receipt, or alert fails to arrive.
Unsubscribe From Unwanted Mail
Filters manage unwanted newsletters, but unsubscribing removes them at the source. Use filters for subscriptions you still value but do not need to see immediately.
Create a Routine
Set aside ten minutes each week to review filtered folders. Delete outdated notifications, save important attachments, and respond to messages that need action.
Frequently Asked Questions
Can I Create Email Filters on a Mobile Phone?
Many email apps allow basic filtering, but full rule settings may be easier to access through a desktop browser. If the option is missing from the mobile app, open the email service’s web version.
Do Email Filters Work on Existing Messages?
In many services, yes. When saving a filter, you may see an option to apply it to current matching emails. This is useful for cleaning an older inbox.
Can a Filter Forward Emails Automatically?
Many email providers support automatic forwarding. Some require you to verify the destination address first. Use this feature carefully when emails may contain private data.
Can I Use More Than One Condition?
Yes. Combining conditions often improves accuracy. For example, you can filter emails from a particular sender only when the subject contains a specific phrase.
What Is the Difference Between Archiving and Deleting?
Archiving removes a message from the inbox but keeps it in your account. Deleting moves it to the trash and may remove it permanently after a set period.
Why Is My Email Filter Not Working?
The sender address may have changed, the subject wording may be different, or another rule may be running first. Check the conditions, rule order, spam folder, and destination folder.
Are Email Filters Safe?
Yes, when they are created carefully. The main risk comes from rules that automatically delete, forward, or hide important messages. Test each rule before depending on it.
Final Thoughts
A clean inbox does not require hours of manual sorting. It requires a few smart rules.
When you Create Email Filters, you turn repetitive inbox tasks into an automatic system. Newsletters can move out of sight, receipts can collect in one folder, client emails can stand out, and security alerts can remain easy to spot.
Start with one problem area. Choose a group of similar messages, set a clear condition, select a safe action, and test the result. Once that filter works, create another.
Over time, these small improvements can save hours and make your inbox feel far less stressful.
Now that you know how to Create Email Filters in seven simple steps, open your inbox and build your first rule today. Share this guide with anyone struggling with email clutter, and leave a comment about the filter that saves you the most time.










Leave a Reply