

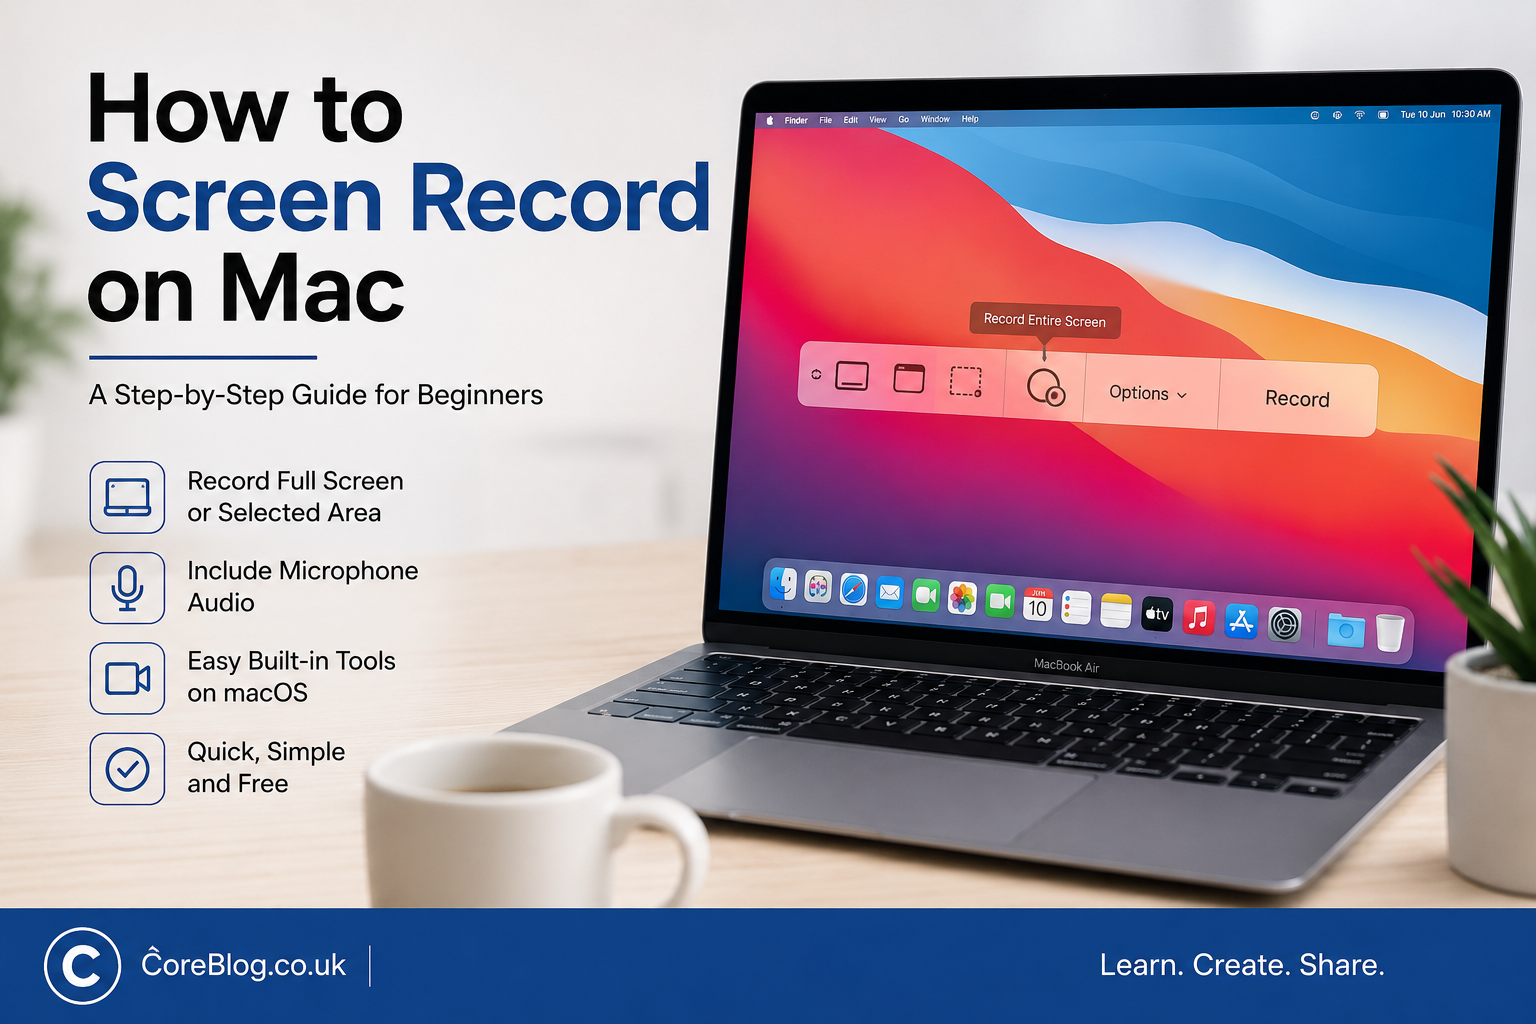
How to Screen Record on Mac Using Screenshot and QuickTime
Knowing how to screen record on Mac is a useful skill whether you’re creating tutorials, recording online meetings, demonstrating software, capturing gameplay, or saving important presentations. The good news is that macOS includes built-in screen recording tools, so you don’t need to install third-party software for most everyday tasks.
Apple provides two primary methods for recording your screen: the Screenshot toolbar and QuickTime Player. Both are easy to use, reliable, and free. Depending on your needs, you can record your entire display, capture only a selected portion, include audio, and customize where your recordings are saved.
This guide explains each method step by step, highlights the differences between Screenshot and QuickTime, shares useful tips for improving recording quality, and answers common questions so you can confidently record your Mac screen.
Key Takeaways
- macOS includes two free screen recording tools: Screenshot and QuickTime Player.
- You can record your entire screen or just a selected area.
- External microphone audio can be recorded directly using built-in options.
- Keyboard shortcuts make screen recording faster and easier.
- Most screen recording problems can be fixed by adjusting permissions or storage settings.
Main Article
Why Use Screen Recording on a Mac?
Screen recording has become an essential feature for work, education, and personal use. Instead of taking multiple screenshots, you can record everything happening on your screen in one video.
Common uses include:
- Creating software tutorials
- Recording online classes
- Capturing virtual meetings
- Demonstrating technical issues
- Saving live streams (where permitted)
- Recording gameplay
- Sharing presentations
- Creating product demonstrations
Because macOS includes built-in recording tools, you can get started immediately without downloading additional software.
Built-in Ways to Screen Record on Mac
Apple offers two built-in options:
| Feature | Screenshot Toolbar | QuickTime Player |
|---|---|---|
| Included with macOS | Yes | Yes |
| Record entire screen | Yes | Yes |
| Record selected area | Yes | Yes |
| External microphone support | Yes | Yes |
| Timer | Yes | No |
| Save location options | Yes | Limited |
| Easy keyboard shortcut | Yes | No |
For most users, the Screenshot toolbar is the fastest and easiest option.
Method 1: How to Screen Record on Mac Using the Screenshot Toolbar
The Screenshot toolbar was introduced in macOS Mojave and remains the easiest way to record your screen.
Step 1: Open the Screenshot Toolbar
Press:
Shift + Command + 5
The recording controls will appear near the bottom of your screen.
Step 2: Choose a Recording Option
You’ll see two recording options:
- Record Entire Screen
- Record Selected Portion
Choose the option that best matches your needs.
Step 3: Configure Recording Options
Click Options to customize your recording.
You can:
- Select where recordings are saved
- Choose a timer
- Show or hide mouse clicks
- Select an external microphone
- Remember your previous selection
Step 4: Start Recording
Click Record.
If recording the entire screen, click anywhere on the display.
If recording a selected area, adjust the frame and click Record.
Step 5: Stop Recording
When finished:
- Click the Stop button in the menu bar, or
- Press:
Command + Control + Esc
A thumbnail preview appears briefly, allowing you to review or edit the recording before saving.
Method 2: How to Screen Record on Mac Using QuickTime Player
QuickTime Player is another built-in application that supports screen recording.
Step 1: Open QuickTime Player
Open QuickTime Player from:
- Applications folder
- Spotlight Search
- Launchpad
Step 2: Start a New Screen Recording
Select:
File → New Screen Recording
The Screenshot controls will appear.
Step 3: Select Recording Settings
Before recording, choose:
- Entire screen
- Selected area
- External microphone (optional)
Step 4: Begin Recording
Click Record and follow the on-screen instructions.
Step 5: Stop and Save
Click the Stop button.
Then:
- Review your recording
- Choose File → Save
- Select a location
How to Screen Record on Mac with Audio
Many users want to record narration or voice explanations.
macOS allows you to record:
- External USB microphone
- Built-in microphone
- Bluetooth microphone
To enable microphone recording:
- Open the recording controls.
- Click Options.
- Select your preferred microphone.
- Begin recording.
Can You Record Internal System Audio?
By default, macOS does not record internal system audio, such as music or application sounds, using its built-in recording tools.
If you need to capture system audio, you’ll typically need third-party software or an audio routing utility.
How to Record Only Part of the Screen
Sometimes you only want to record one application or a small section of your display.
To do this:
- Press Shift + Command + 5.
- Choose Record Selected Portion.
- Resize the recording frame.
- Position it over the desired area.
- Click Record.
This method keeps recordings focused and reduces unnecessary distractions.
Where Screen Recordings Are Saved
By default, recordings are usually saved to the Desktop.
You can change the save location:
- Open Screenshot controls.
- Click Options.
- Choose one of the available locations, such as:
- Desktop
- Documents
- Downloads
- Clipboard
- Messages
- Another folder
Selecting a dedicated folder can help keep your recordings organized.
Useful Keyboard Shortcuts
| Shortcut | Action |
|---|---|
| Shift + Command + 5 | Open Screenshot toolbar |
| Shift + Command + 3 | Capture entire screen |
| Shift + Command + 4 | Capture selected screenshot |
| Command + Control + Esc | Stop recording |
Learning these shortcuts can make screen recording much faster.
Screenshot Toolbar vs QuickTime Player
Both tools work well, but they suit different preferences.
| Screenshot Toolbar | QuickTime Player |
|---|---|
| Faster access | Traditional interface |
| More recording options | Familiar media player |
| Easy save location settings | Good for simple recordings |
| Built into macOS | Built into macOS |
For most users, the Screenshot toolbar offers the quickest workflow.
Tips for Better Screen Recordings
A few simple practices can improve the quality of your recordings.
Clean Your Desktop
Remove unnecessary files and close unrelated windows before recording.
Turn On Do Not Disturb
This prevents notifications from appearing during your recording.
Use a Good Microphone
If you’re recording narration, an external microphone often provides clearer audio than the built-in microphone.
Close Unnecessary Apps
Freeing up system resources can help ensure smoother recordings, especially during longer sessions.
Record in Full Resolution
Recording at your display’s native resolution results in sharper, more professional-looking videos.
Common Screen Recording Problems and How to Fix Them
Screen Recording Won’t Start
Possible solutions:
- Restart your Mac.
- Update macOS.
- Close background applications.
- Check available storage space.
Black Screen During Recording
This may occur with protected streaming content or apps that restrict screen recording.
No Audio
Check that:
- The correct microphone is selected.
- The microphone isn’t muted.
- The application has permission to use your microphone.
Recording Stops Unexpectedly
Possible causes include:
- Low storage space
- High CPU usage
- System interruptions
Closing unnecessary applications can often improve stability.
Best Practices for Organizing Recordings
As your recordings grow, keeping them organized saves time.
Consider:
- Creating folders by project or client
- Using descriptive filenames
- Backing up important recordings
- Deleting outdated files to free storage
An organized workflow makes it easier to locate videos when you need them.
When Should You Use Third-Party Screen Recording Software?
The built-in macOS tools are sufficient for most users. However, dedicated recording software may be worth considering if you need features such as:
- Recording internal system audio
- Multiple video sources
- Webcam overlays
- Live streaming
- Advanced editing
- Real-time annotations
For tutorials, meetings, presentations, and everyday recording tasks, Apple’s built-in tools remain an excellent choice.
Frequently Asked Questions
1. How do I screen record on a Mac without installing software?
Use the built-in Screenshot toolbar by pressing Shift + Command + 5 or open QuickTime Player and choose New Screen Recording.
2. Can I record my Mac screen with audio?
Yes. You can record audio from your built-in or external microphone by selecting it in the recording options before you start.
3. Can I record internal system sound on a Mac?
Not with Apple’s built-in screen recording tools. Recording system audio typically requires additional software or an audio routing utility.
4. Where are screen recordings saved on Mac?
By default, recordings are usually saved to the Desktop, but you can choose another location through the Screenshot toolbar’s Options menu.
5. Can I record only one window?
The built-in tools let you record a selected portion of the screen rather than locking to a specific application window.
6. Why isn’t screen recording working on my Mac?
Common causes include insufficient storage, outdated software, missing permissions, or too many applications running at once.
7. Which is better: Screenshot or QuickTime Player?
For most users, the Screenshot toolbar is faster and offers more convenient options. QuickTime Player is still a reliable alternative for simple recordings.
Conclusion
Learning how to screen record on Mac is straightforward thanks to Apple’s built-in Screenshot toolbar and QuickTime Player. Whether you’re recording tutorials, online classes, presentations, meetings, or software demonstrations, both tools provide an easy and dependable way to capture your screen without additional downloads.
The Screenshot toolbar is the best choice for most users because it offers quick access, flexible recording options, and customizable settings. QuickTime Player remains a solid alternative for users who prefer its familiar interface. By following the steps and best practices in this guide, you can create clear, professional-quality screen recordings while avoiding common issues and keeping your files organized.













Leave a Reply